Back-to-Front Binding

Back-to-Front binding is a quick binding technique where you make the quilt backing big enough to fold over to the front of the quilt and become your binding.
Quick Tips Before We Begin
- Make sure your backing is at least 2" bigger than your quilt top before you start quilting. This will leave enough for the Back-to-Front binding.
- Avoid quilting off of your quilt top into the extra batting and backing. You'll need to take out these stitches before you can do this kind of binding technique.
Instructions
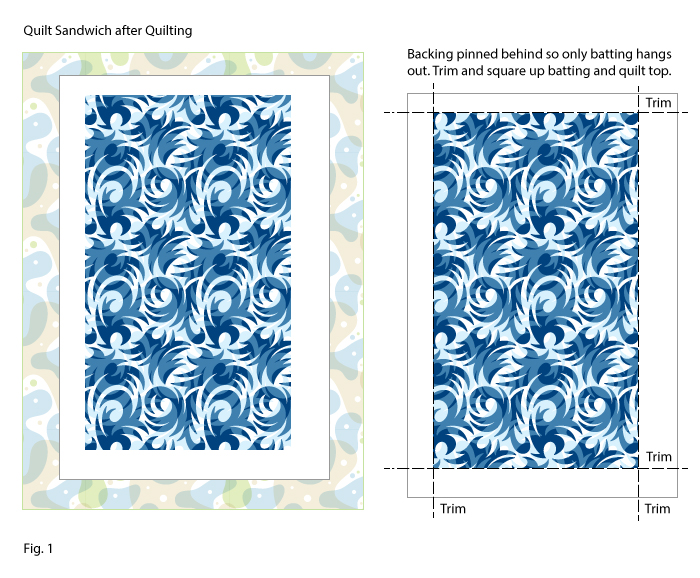
Step 1 - Squaring things up
Fold and pin your excess backing behind the quilt so that only the extra batting and your quilt top are visible. Use you ruler and rotary cutter to trim away the extra batting and square up the quilt top. See Figure 1.
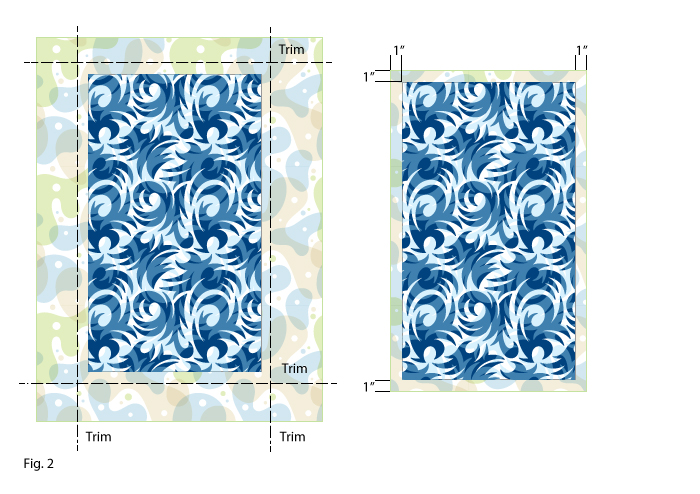
Unpin your backing and decide how wide you want your finished binding to be. Multiply that size by two to get the size you need to trim your backing down to. For example, if you want a 1/4" finished binding, cut your backing down to 1/2" sticking out around the quilt top. If you want 1/2" binding, trim the backing to 1". See Figure 2.
Step 2 - Creases
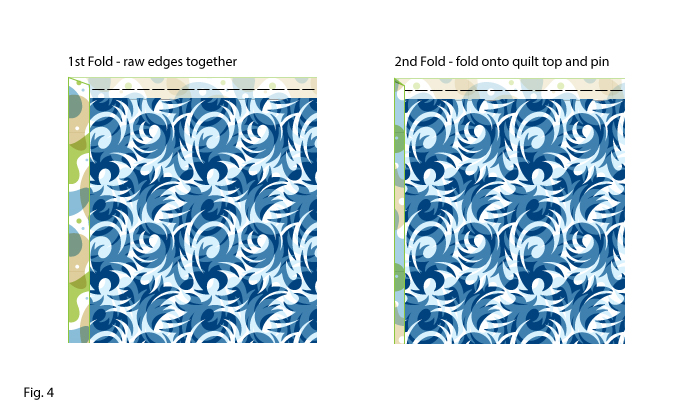
Fold and press the extra backing in half so that the raw edge is touching the quilt top's raw edge. See Figure 3. Repeat on all four sides to crease each side.

Step 3 - Folding and Pinning
Fold one edge of the backing along the crease so its raw edge is touching the quilt top's raw edge. Fold this edge over so that it overlaps the quilt top by the width of your final binding size. Pin the edge in place. See Figure 4.
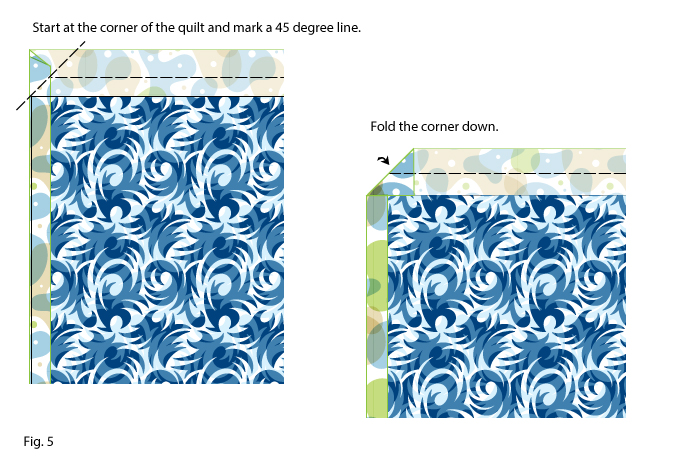
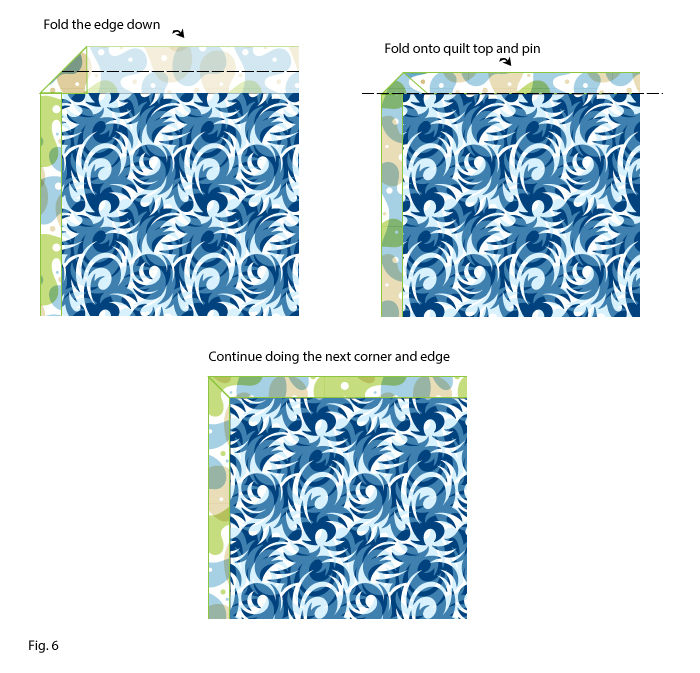
Pick a corner on the edge you just pinned down. Fold the corner down along the 45 degree mark as seen in Figure 5.
Fold the next edge, after the corner you just folded, down along its crease. Fold it again so it overlaps the quilt top edge the width of your desired binding size and pin in place. A perfect mitered corner should have been created. See Figure 6 for reference.
Fold the next corner and continue around doing the edges and corners until all edges are pinned. Press as needed.
Step 4 - Sewing
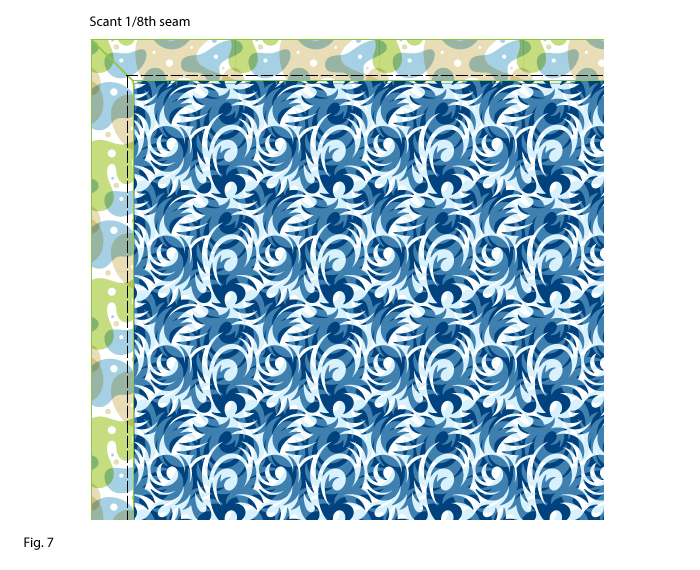
With all edges pinned, sew your binding down with a scant 1/8" as shown in Figure 7.
Leave a Comment